Editor Menu
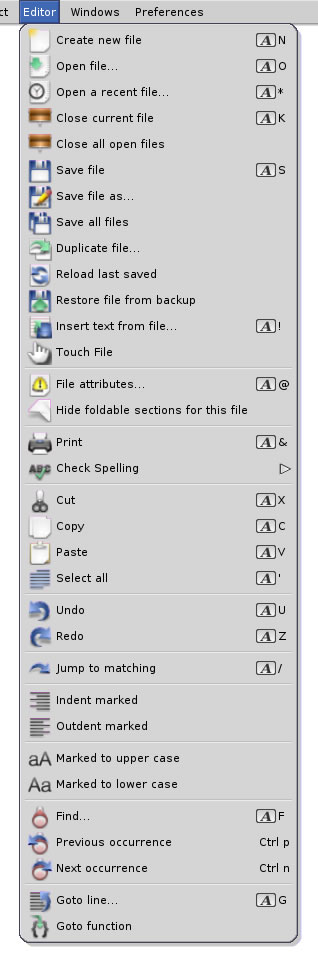 Create new file
This will open a new blank file. A header is created which includes some information about the project. This
function is also mirrored in the Editor buttons.
Open file...
Load a file into the editor by selecting the file required from the resulting requester. This function is also
mirrored in the Editor buttons.
Open a recent file...
When files that are not part of the current project are opened, they are added to a list of opened files. Selecting
this item will reveal this list, and a file can be selected and opened in the editor. This works in exacly the same
way as the Recent Project list.
Close current file
This has the same effect as clicking the close gadget of the editor window, or clicking the close gadget of
the tab which represents the current file. Even though the file has been closed, it is still loaded as part
of the project. Double-click it in the project list (or drag it
into the editor) to reopen it.
Close all open files
Normally, files are closed by clicking the "close" gadget on the tab that represents the file. If
you wanted to close all the files, this could be very time consuming, so this item will do it for you. After closing
all open files, the editor window will also be closed, as there is noting to display.
Save file
This will save the current file back to disk. This function is also mirrored in the
Editor buttons.
Rename file...
The current file will be saved to disk with the name supplied. Optionally the path can be changed if the file
is required in a different location. This function does affect the project as the new file name will be used.
This is the same functionality as supplied by the project rename popup menu.
Save all files...
If the setting to automatically save files has been disabled, then
there is a good chance that there may be quite a few unsaved files within the project. Selecting this item will
save any files that have been modified and not yet stored on disk. This saves having to save each one manually.
Duplicate file...
This item allows you to create a duplicate of the current file with an alternate name or path. Unlike
Rename, this does not reassign the file within the project to the new name/path. You
may wish to use a file in a different project, for example, so by selecting this item, you can specify the path
and/or name in the file requester and have the file copied with these new details.
Reload last saved
This function will reload the current file from disk losing any changes that may have been made.
Restore file from backup
If you have the Create Backup setting enabled, selecting this menu item
will restore the current text to the last backed up version. This differs in usage from the
Reload last saved menu, in that selecting this item will restore to the version
saved prior to the currently saved file.
Remove all backup files...
If you have enabled the "Create a backup before saving" preferences
option, each time a file is saved a .bak file is created so that you can "restore" the file, effectively
undoing the changes just made. The project directory can very quickly become full of backup files. Selecting this
menu will prompt you to confirm you want to remove all backup files in the project directory.
Insert text from file...
Sometimes it might be useful to be able to insert the text from one file into another. Selecting this item
will present a file requester, and a file may be chosen. All the text in this file will then be inserted
into the current in the editor at the cursor position. No checks are performed for the integrity of the
chosen file or its contents, but only ASCII characters will be inserted.
Touch File
"Touching" a file means to set the date and time of the file on the disk to the current
timestamp. This can be useful for automated build systems that use the timestamp of the file to
check if the source needs to be built.
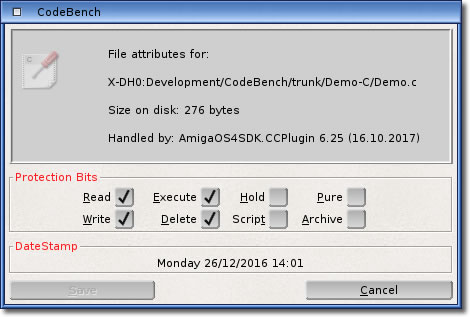 File attributes...
This will display the attributes of the current file. From here you can adjust the protection bits as required.
You may also invoke this window from both the Project popup and the
Editor popup menus.
Hide foldable sections for this file
This item mirrors the button in the Editor window, and controls whether to
show sections of code that can be folded or not.
Print
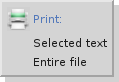 This option works in two different ways:
The first way is to simply select this item, and the entire contents of the current file will be
output to the printer.
The second way is to select a block of text, and you will then be presented with an option to only
print the selected block, or the entire text. This allows you to print segments of text, rather
than the entire file.
The printer device can be configured in the
Preferences editor.
Check Spelling
This allows you to check the spelling of words within a document. This feature is covered in
more detail in the Spell Checking section.
Cut
Remove the marked block of text and place it in the clipboard. This function is mirrored in the
Editor buttons and the Editor popup menu.
Copy
Duplicate the marked block of text in the clipboard. This function is mirrored in the
Editor buttons and the Editor popup menu.
Paste
Copy the contents of the clipboard at the current cursor position. This function is mirrored in the
Editor buttons and the Editor popup menu.
Select all
This item will select all text in the current file, which may then be copied or even cut.
Undo
Revert the last change made to the text.
Redo
If a change was reverted, it may be possible to carry out the change again.
Jump to matching
If the cursor is positioned at a character that marks a
"scope"
like brackets and braces, selecting this menu will cause the cursor to jump to its counterpart. This makes it
very easy to follow where blocks of code begin and end. This option is also available from the Editor popup menu.
Indent marked
All lines in the currently marked text block will be shifted a
tab size amount of characters to the right.
Outdent marked
All lines in the currently marked block will be shifted a tab size
amount of characters to the left, if possible.
Marked to upper case
After marking a block of text, selecting this item will convert the selected text to upper case letters.
Marked to lower case
After marking a block of text, selecting this item will convert the selected text to lower case letters.
Find...
Open the Find window and find a specified string of characters in the current
file. This function is mirrored in the Editor buttons and the
Editor popup menu.
Previous occurrence
If a search has been performed which resulted in more than one hit in the current file, this item will place the
cursor on the line of the previous occurrence of the searched string.
Next occurrence
If a search has been performed which resulted in more than one hit in the current file, this item will place the
cursor on the line of the next occurrence of the searched string.
Goto line...
Specify a line that the cursor should be moved to in the current file. This function is mirrored in the
Editor buttons.
Goto function...
The currently marked block is treated as a function name. The entire project is searched for this function,
and if found, will cause the file containing it to become current. The cursor will be moved to the first
line of that function. This is also possible by holding down either "Shift" key while double-clicking
to highlight the block that represents a local function.
back to the top
|


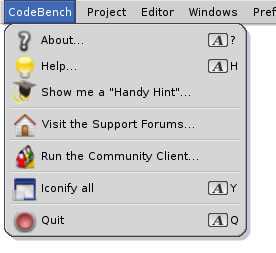 About...
 These are brief overviews of various topics that may not be instantly obvious to the user. By selecting this
menu, you can view all the hints. If a hint is of particular interest, you may select the
"Show me more" option and this documentation will open at the appropriate place to allow
you to read about the topic in more detail. The
These are brief overviews of various topics that may not be instantly obvious to the user. By selecting this
menu, you can view all the hints. If a hint is of particular interest, you may select the
"Show me more" option and this documentation will open at the appropriate place to allow
you to read about the topic in more detail. The 
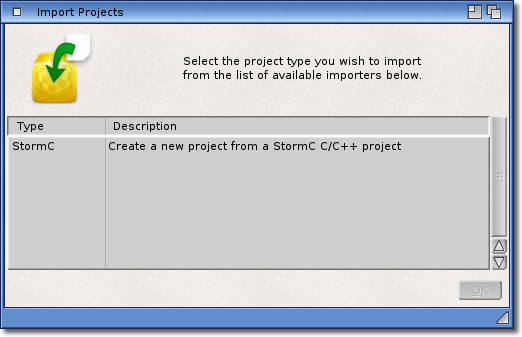 Opens a requester listing any importers that the currently installed plugins may support. As of the time of writing,
only the AmigaOS4SDK plugin has an importer for StormC projects. You may select the type of project to import from
the list, and you will be asked to supply the full path to the project that you wish to import. If the project is
verified as the correct type, the importer will create a new project from it, and automatically include the files
within it. This makes it extremely easy to migrate from StormC to CodeBench, and saves having to recreate your
projects. Whether the source actually compiles is another matter though!
Opens a requester listing any importers that the currently installed plugins may support. As of the time of writing,
only the AmigaOS4SDK plugin has an importer for StormC projects. You may select the type of project to import from
the list, and you will be asked to supply the full path to the project that you wish to import. If the project is
verified as the correct type, the importer will create a new project from it, and automatically include the files
within it. This makes it extremely easy to migrate from StormC to CodeBench, and saves having to recreate your
projects. Whether the source actually compiles is another matter though!
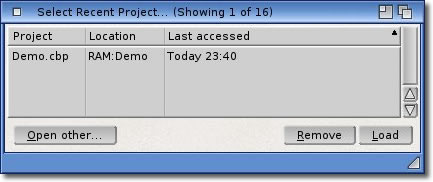 Each time you create or load a project, it is added to an internal list of recently accessed items. This menu
shows the requester that allows you to select a project from that list. The time and date is shown for
convenience, and the list is ordered with the most recent item at the top. The
Each time you create or load a project, it is added to an internal list of recently accessed items. This menu
shows the requester that allows you to select a project from that list. The time and date is shown for
convenience, and the list is ordered with the most recent item at the top. The 
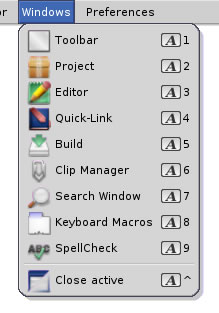 The numbered items in this menu corresponds to one of the component windows. If the window has been hidden
or iconified, it will be opened. If the window is open, selecting the relevant menu item will bring that
window to the front of the display.
The numbered items in this menu corresponds to one of the component windows. If the window has been hidden
or iconified, it will be opened. If the window is open, selecting the relevant menu item will bring that
window to the front of the display.